Last updated on December 31, 2024
How to: Create a boost campaign alongside your Labelizer Strategy
Do you know how to boost products in Google’s shopping campaigns? While Labelizer is an always-on-strategy there are ways to further improve your Shopping campaigns in Google. One trick is to use boost campaigns, which are used to boost (seasonal) products alongside your existing campaigns which are already set up according to the Labelizer Strategy. This blog will explain how to structure the Producthero Platform and Google Ads when creating a boost campaign.
Don’t know what the Labelizer Strategy is? We recommend that you read this article first.
Which products belong in a boost campaign?
Examples of products that can be put in a boost campaign are newly added products, specific holiday-related products (which are sold only temporarily), or sale products. The latter is explained in a more elaborated example:
For the merchant: Heroshop, winter is ending and the spring collection is already added to the assortment for a while. The winter collection is on sale. Heroshop decides to take the sale products out of the existing Labelizer structure and puts them in a new (boost) campaign.
Configure the Labelizer Strategy within Producthero
In this example, we will put sale products in a boost campaign. Therefore, you want to exclude these products from your Labelizer structure. To do this, create a segment in which the “regular” products are included and thus the sale products are excluded.
Steps in the Producthero Platform:
First go to Advertising and click on “Add Product Group”
Complete the following steps to create your product group:
- Name your Product group
- Select the values you want to include in your segment. You can segment the products by Availabiltiy, Brand, Custom Label, GTIN, Product Type, Item ID, MPN and Google Category.
- We show performance data over the last 30 days. Based on this, you can decide whether there is enough data to create a segment.
Once you’re happy with your selection, click on ‘Add product group’.
Create a Boost Campaign in Google Ads
When implementing the Labelizer Strategy within your Google Ads campaigns, you can use either Performance Max or a standard Shopping campaign but we strongly recommend using PMax. In this example, we chose Performance Max and then used the following campaign structure (keep in mind that this is an example):
| Campaign | Target ROAS | Budget |
| Heroes, Sidekicks and Zombies (excl. Sale products) | 600% | High |
| Villains (excl. Sale products) | 600% | Low |
| Boost – Sale | – | Medium |
As you can see in the table above, the boost campaign does not yet have a target ROAS (Return on Ad Spend) as we wanted to give Google’s algorithm full space to get results without being capped by a ROAS target. Of course, this is something that you should carefully consider and monitor. If you want to learn how to calculate your perfect target ROAS, read this article. You also see that all the other campaigns use the same target ROAS, this is explained in this article.
Creating a Listing Group for your Boost campaign
Through Listing Groups we can make the distinction between the different campaign structures.
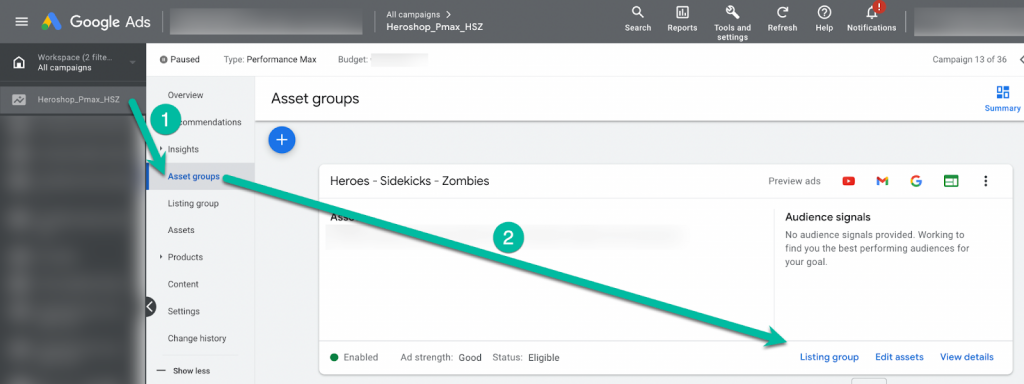
Listing group 1: the Heroes, Sidekicks, and Zombies campaign contains everything except the Villains and Sale products: Originally, this was an ‘all-products’ campaign. So, we are going to exclude the Villains and sale products from this campaign.
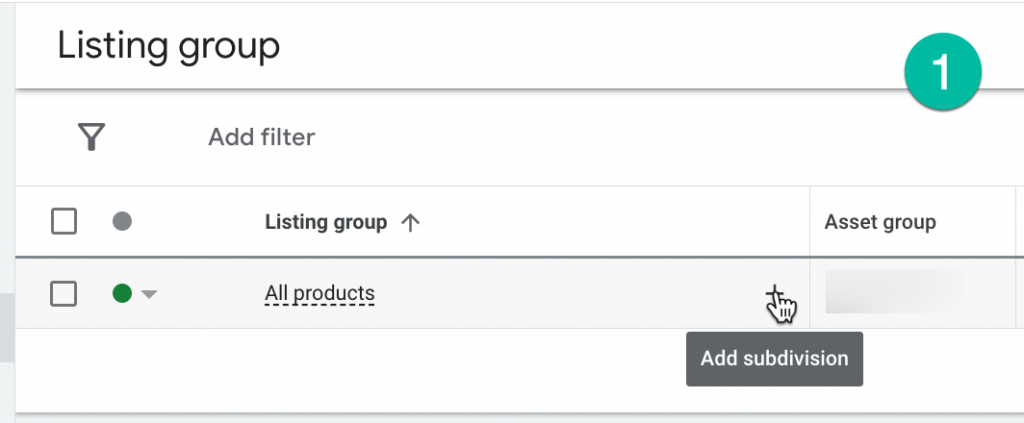
In this example, the Labelizer Strategy labels are set on Custom Label 0 and the Sale products on Custom Label 1.
- Click on the + next to “All Products”
- Select Custom Label 0 and click on Villains
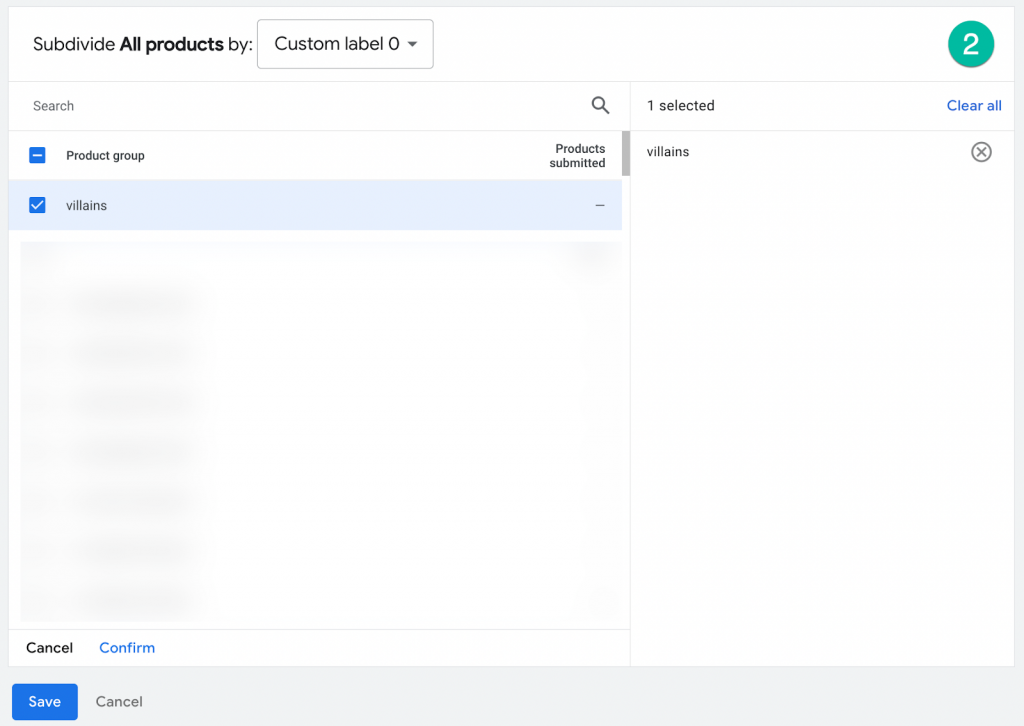
- The Villains are now included in the Listing Group, however, we want to exclude them. So, click on the green dot and click on exclude.
- The next step is to add the “Sale” products to the Listing Group, so we can exclude them. Click on the + next to “Everything else in All products”.

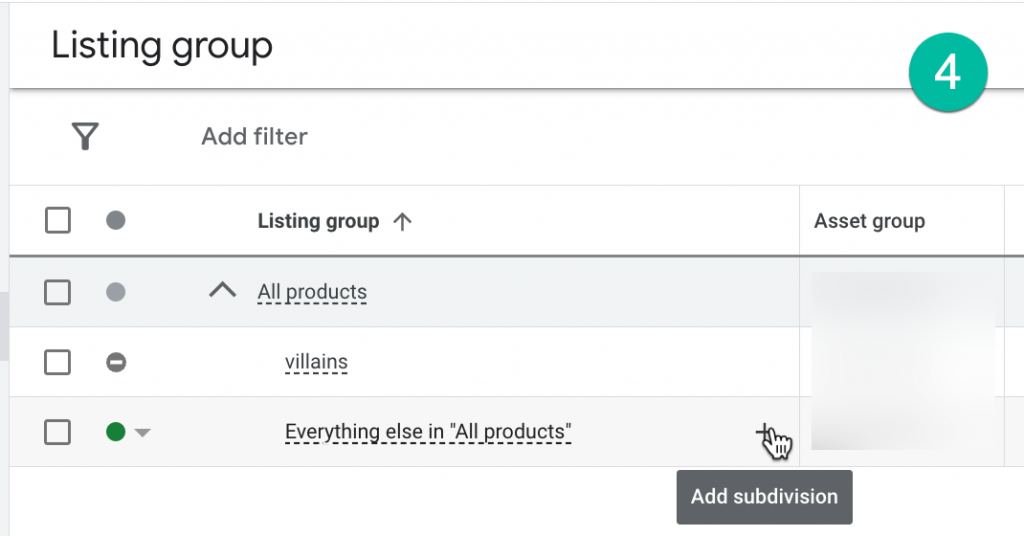
- Select Custom Label 1 and click on Sale.
- The Sale products are now included in the Listing Group, however, we want to exclude them. So, click on the green dot and click on exclude
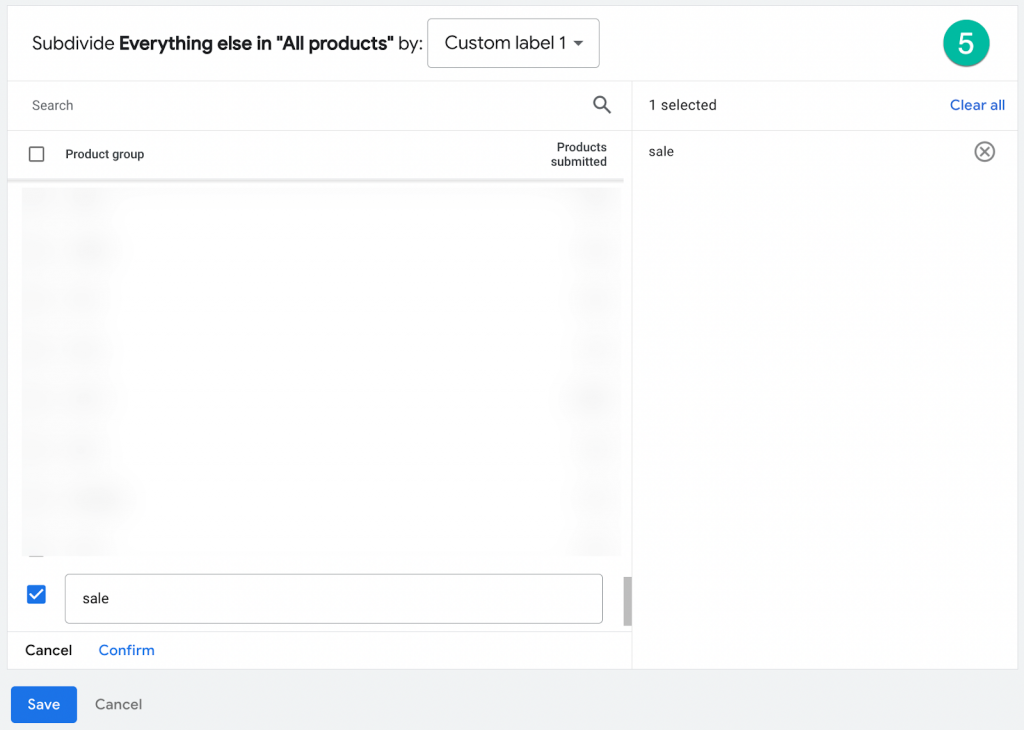

- Done! The Listing Group of all products except Villains & Sale looks like this:

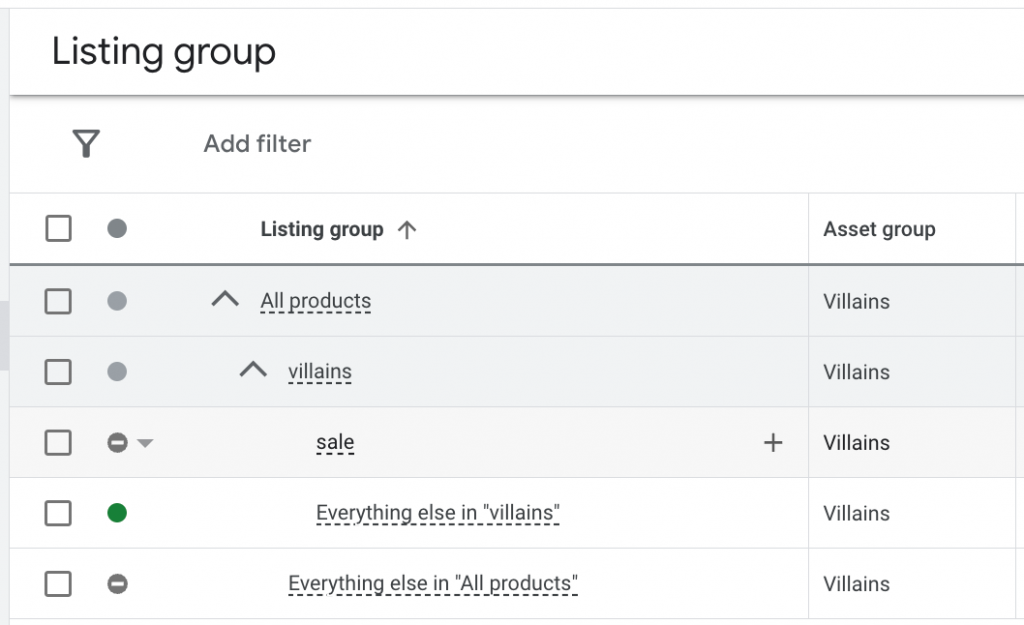
Listing group 2: the Villain campaign
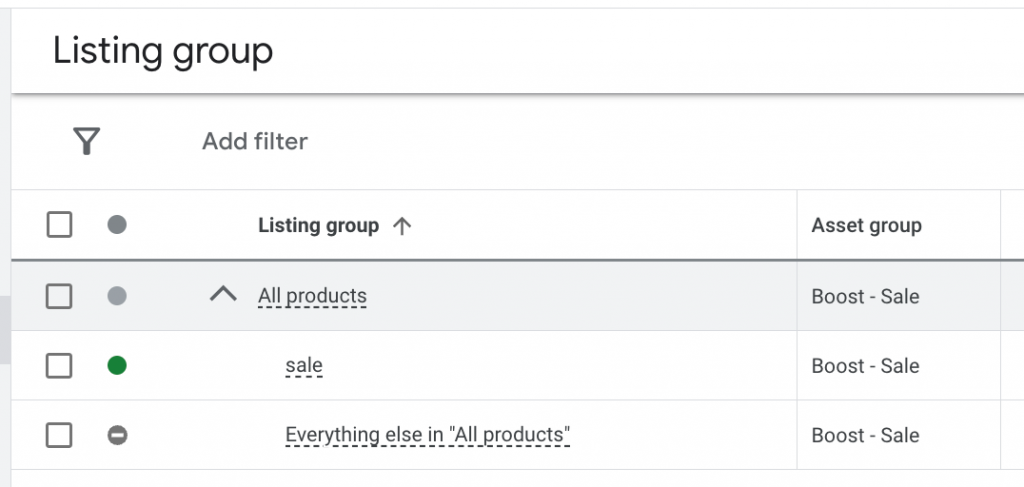
Listing group 3: the (sale) boost campaign:
Achieve great results with Labelizer Strategy
As you know, choosing your campaign structure can be challenging. However, we’ve seen thousands of retailers achieve great results using Producthero’s Labelizer structure. A great example is a retailer in bathroom furniture, they achieved a 61% revenue growth for the product category in which they used the Labelizer Strategy. Read the full case study to see how you can also achieve such results.

