Last updated on September 24, 2024
How to use the Producthero Labelizer Strategy for Performance Max Campaigns: Set this up in Producthero Platform and Google Ads.
With the introduction of Performance Max campaigns in 2022, Google takes more control while providing fewer insights to advertisers. The Producthero Labelizer Strategy is the perfect strategy to regain control and get more insights. Most importantly, implementing this strategy can significantly boost your campaign performance by pushing Google’s algorithms to work more efficiently. In this article, we’ll guide you through setting up the Producthero Labelizer Strategy for your Performance Max campaigns.
Note: For more information on Performance Max (pMax) campaigns, read our article: Everything you need to know about Performance Max.
In this article, we explain how to set up a Performance Max campaign using the Producthero Labelizer Strategy. We have tested this strategy with many retailers and agencies and have collected tips and best practices that we will share later in this article.
Additionally, we recommend that you first read our article “Lablizer Strategy, forcing Google’s algorithm to be more efficient” to understand how the Labelizer works and its main effects on your campaigns.
A) Setting up the Labelizer Strategy in the Producthero Platform
If you prefer, you can also watch this video where we explain how to set up the Labelizer Strategy in the Producthero Platform.
1- Access ‘Advertising’ section
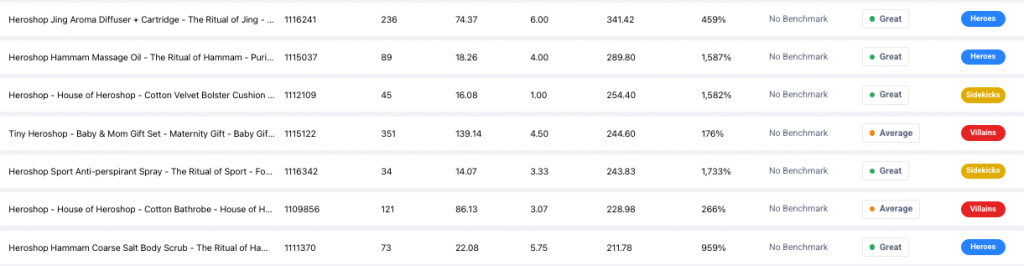
First, go to ‘Advertising’ section on the left menu in the Producthero Platform. There you will have access to the Producthero Labelizer Strategy.

The best part is that everyone joining Producthero (even on the basic plan) gets access to the overview of product performance (see image below), as well as the distribution of products over the four labels (Heroes, Sidekicks, Villains and Zombies) and the recommended strategy. This will allow you to show why the Labelizer Strategy is important for your organisation.
To fully leverage the Producthero Labelizer Strategy in your Google Ads campaigns and maximize your advertising budget, upgrading to the PRO plan is essential.
2- Adjust the Labelizer Strategy metrics
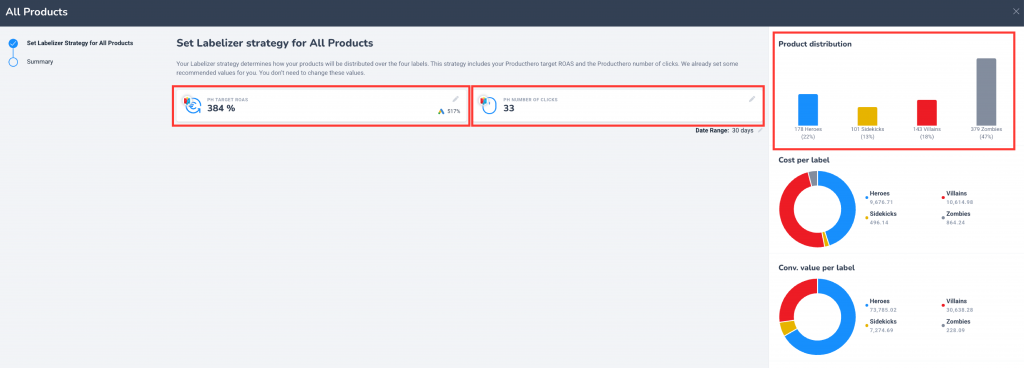
Once you are in the Advertising section, you will see a strategy created by Producthero, based on our best practices, already in place. You can adjust this strategy by clicking “Adjust Labelizer Strategy” on the right side of the screen (see screenshot below).

After clicking “Adjust Labelizer Strategy” you will see the following screen (see screenshot below). Here, you can adjust two crucial metrics: the Producthero target ROAS (which is NOT the same as your Google Ads target ROAS) and the number of clicks. These two metrics determine the distribution of your products over the 4 different labels mentioned earlier.
Note: in this article, we explain in detail how labels are assigned based on these two metrics and your products’ performance.
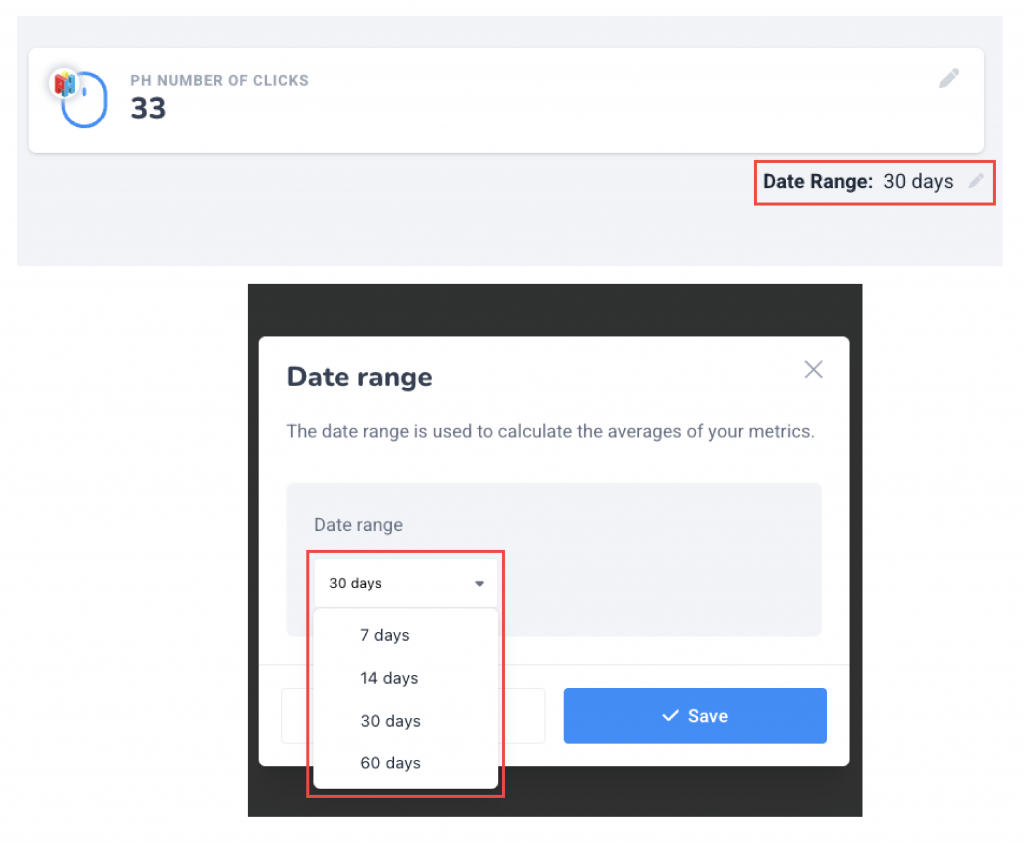
Now it’s time to determine and edit the metrics you want to set as Producthero target ROAS and as number of clicks. To set these metrics, click on the pencil icon in the top right corner (see screenshot below).

Here are our recommendations for determining these metrics:
- Producthero target ROAS: Set a target ROAS that is 25% lower than your actual ROAS in Google Ads.
- Number of clicks: Set a number of clicks lower than the average number of clicks you normally need to achieve a conversion.
After adjusting these two metrics, adjust the data range (see image below). We generally recommend using the last 30 days for this metric.
Once done, click “Next step” in the bottom right corner. You will then see a summary of your adjustments and daily budget advice per label.

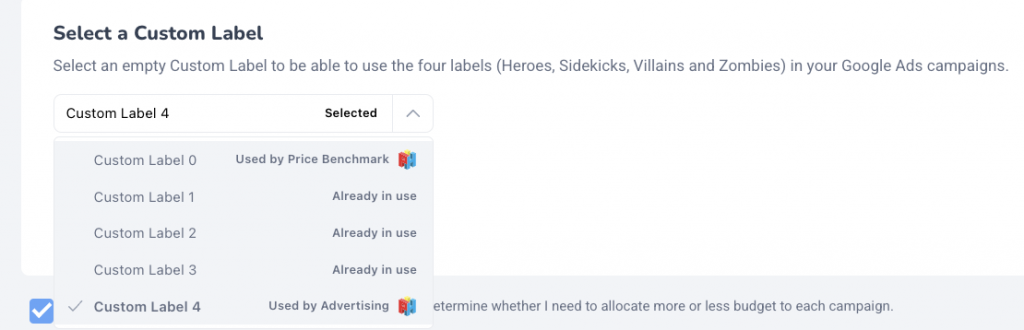
3- Select a custom label
The third and final step is to select a custom label. To do that, you first need to click on “Enable the advertising label in your feed”.
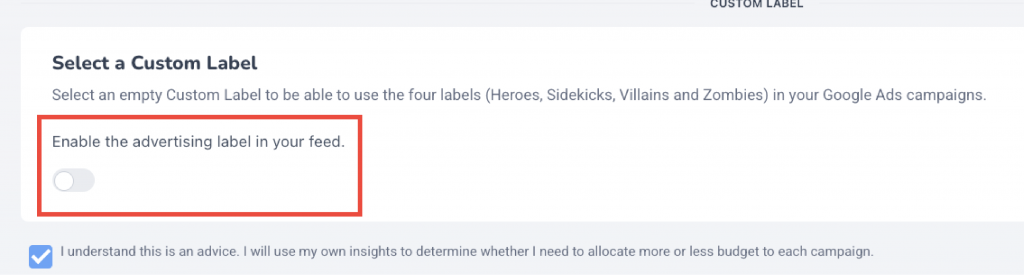
Now you have to select an empty custom label to make sure that the labels generated by Producthero are pushed to your product feed.
You’re all set! You have completed the Producthero Platform setup and are now ready to set up a Performance Max campaign, automatically segmenting products using the Labelizer Strategy in Google Ads.
B) Setting up Performance Max campaign + Labelizer Strategy in your Google Ads account
Now, we’ll create different campaigns for your different labels. To achieve the highest performance from your Performance Max campaigns, we recommend setting up five separate campaigns (see image below) using your historical data. However, it’s important to consider various factors when deciding on the setup. Depending on your main goal, available performance data, expertise level, and other factors, different setups may be more suitable.
In this article, we explain 5 Proven Product Segmentation Strategies for Increased Revenue and Profitability while considering the different factors.

If you have fewer than 30 conversions for either Heroes or Sidekicks in the last 30 days, combine the Heroes and Sidekicks into a single campaign. In this case, you will need to set up only four campaigns.
Note: If you don’t have any historical shopping ads data, we advise you to start with one campaign first (containing all products) and link it to the Producthero Platform. By doing this, Google is able to quickly collect data and as the number of conversions increases, labels in the Producthero Platform will start to be assigned. After you have gathered enough conversion data, you can create a campaign for each label.
We will now explain step by step how to set up a Performance Max campaign for the Heroes label.
You can also watch this video to see how you can set up the Labelizer strategy and create Performance Max campaigns while automatically segmenting your products in the new Producthero Platform.
Here are the steps for setting up a pMax campaign:
1. Create the campaign and select the campaign goal
The first step is to go to the Google Ads dashboard and create a new campaign. Select a suitable campaign objective; in this case, choose “Sales.” Next, set “Purchases” as the conversion goal.
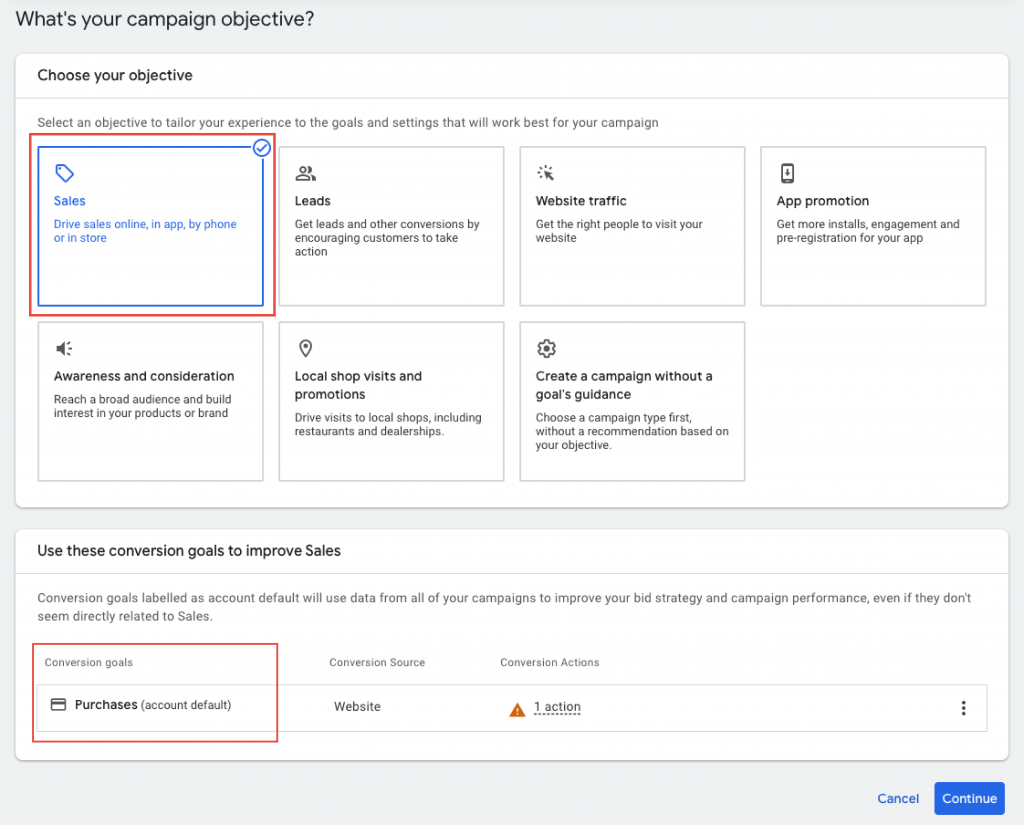
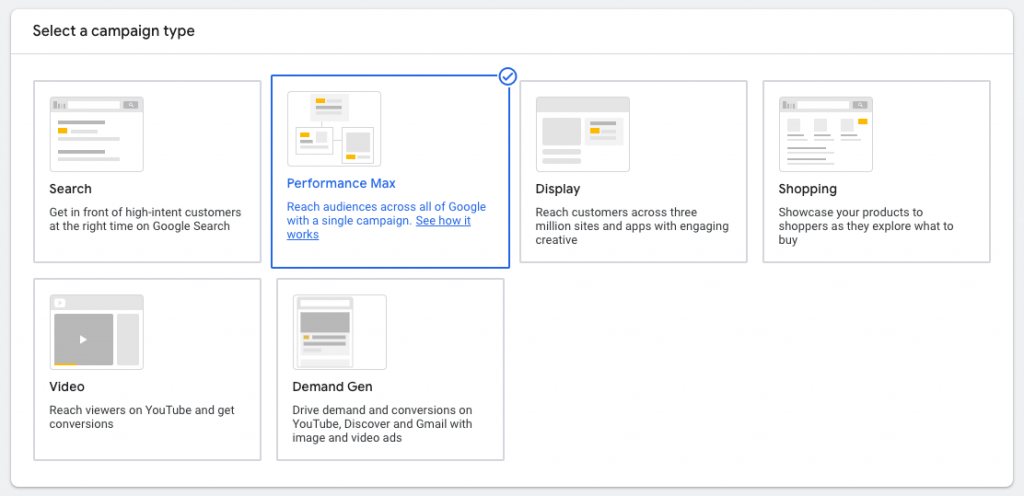
Click “Continue” and choose Performance Max as the campaign type.
Select your Merchant Center account, then enter your campaign name, including the name of the label. We recommend including the country, campaign type, and label name in the campaign name. For example, we’ll use “NL_PMax_Heroes.”

Now, click “Continue” to adjust the bidding.
2. Adjust the bidding
The next step is to select the bidding strategy, which in this case is “Conversion Value.” Check the box for “Set a target return on ad spend” and enter your target amount. You can also choose to optimize the campaign for acquiring new customers if desired.
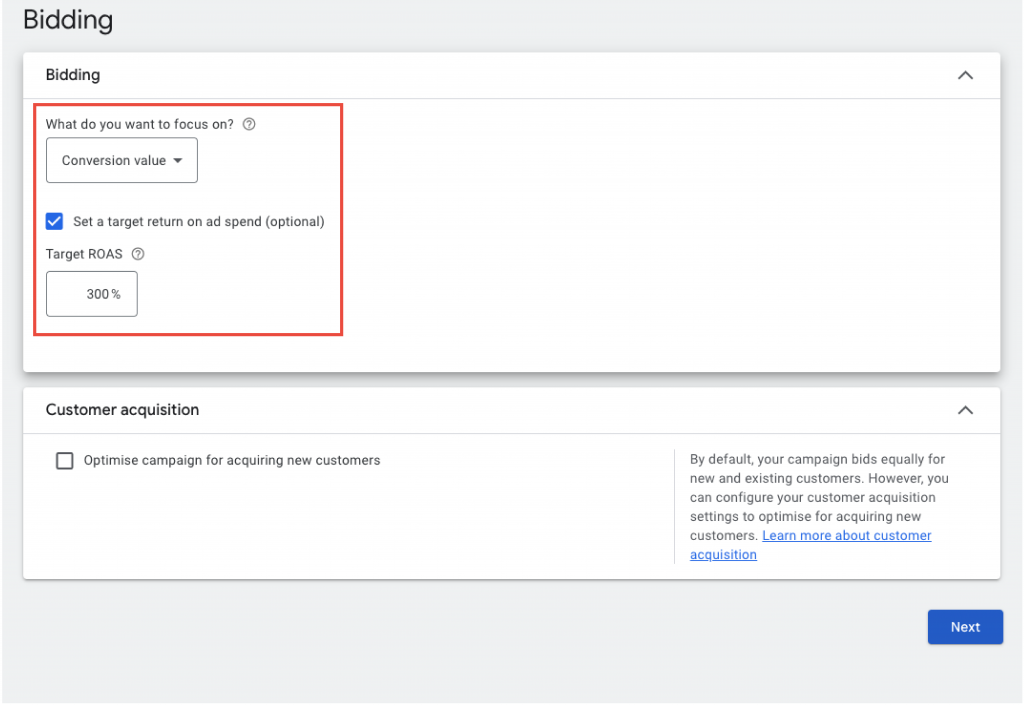
NOTE: It is highly recommended to set the same target ROAS for all 4 or 5 campaigns using the Producthero Labelizer Strategy. Not doing this can result in poor performance. Read this article to understand why it’s crucial to set the same target ROAS for your campaigns using the Labelizer Strategy.
3. Campaign settings
A. Locations
Select the location you want to target. In this example, we’ll target the Netherlands.
B. Languages
Choose the language you want your ads to serve in. Google suggests languages based on your target location. In this case, we’ve selected Dutch.
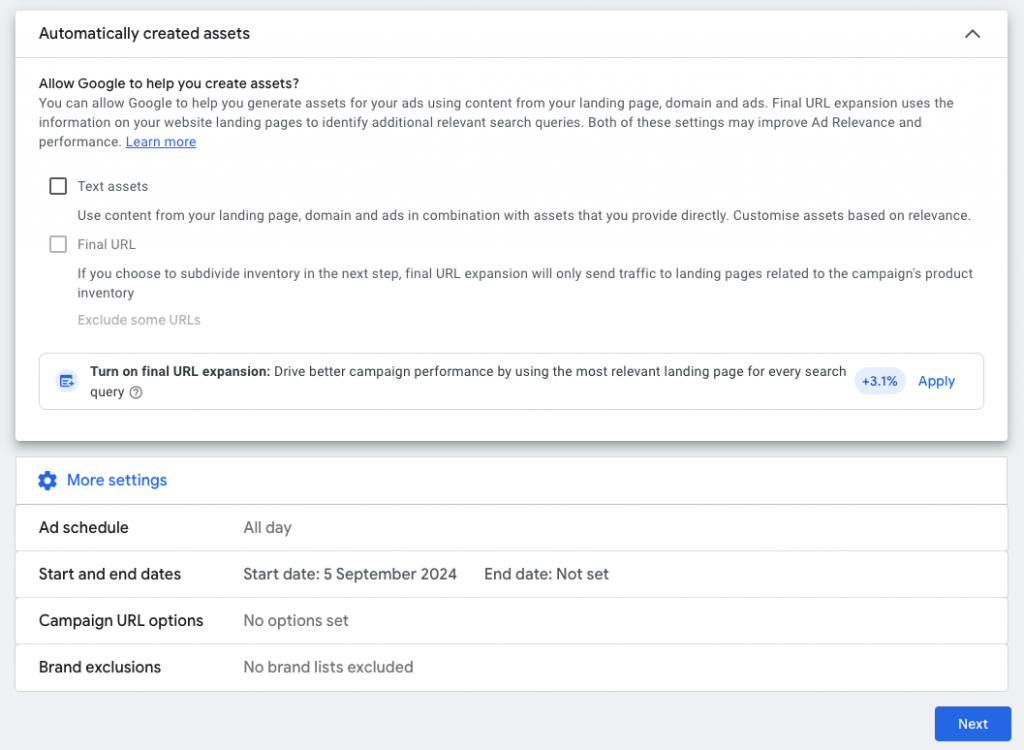
C. Automatic curated assets
We recommend turning off automatic curated assets (both text assets and Final URL).
Final URL expansion is an important setting if you want control over the landing pages targeted in your Performance Max campaign. If this setting is turned on while using the Producthero Labelizer Strategy, part of your budget may be allocated to irrelevant pages, such as category pages, blogs, the homepage, or the contact page. For most advertisers, we recommend turning this option off.
When you click on the “More Settings” button, you can decide whether you want to turn your final URL expansion on or off.
- Turning your final URL expansion on means that Google is able to use all pages of your website in the Performance Max campaign.
- Turning your final URL expansion off means that Google only targets the pages from your Merchant Center and the final URL of your Ad Assets. (Recommended)
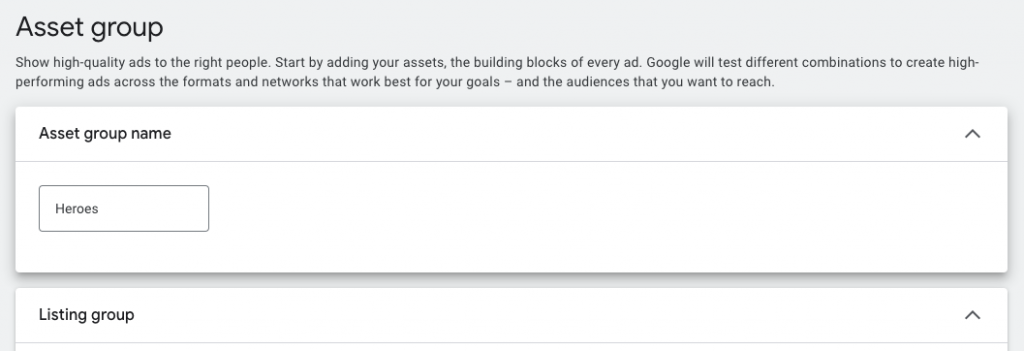
4. Asset group
The next step is to build your asset group (formerly known as an ad group). This campaign will focus on “Heroes” products, so we will create an asset group with only these products.
First, name your asset group. In this situation, we will call it “Heroes”.
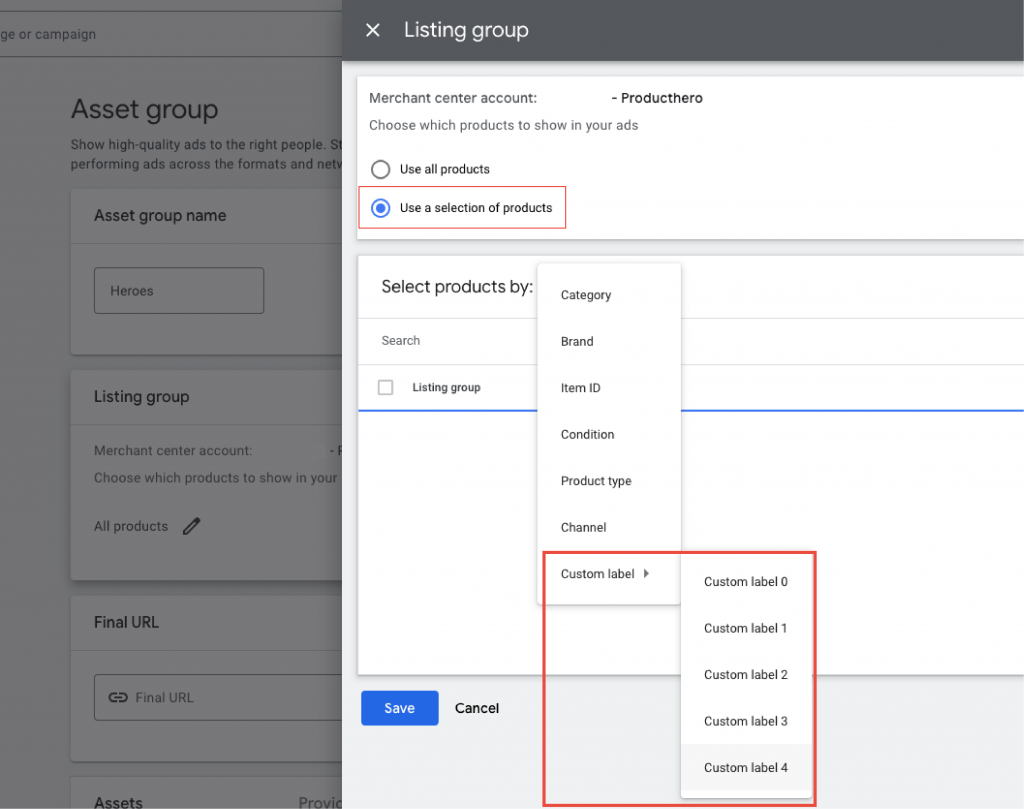
Within the “Listing group,” click the pencil icon next to “All products.” Select “Use a selection of products,” then choose the custom label where you set the Labelizer Strategy. You can check your custom label in the Producthero Platform. In our case, the Labelizer Strategy is set under “Custom Label 4,” so we select this label and then choose the “Heroes” products.
Next, you can add assets, but we recommend not adding them. By not adding assets, the campaign will function as a Smart Shopping campaign.

Scroll down and add an audience signal if you want. Then click “Next”.
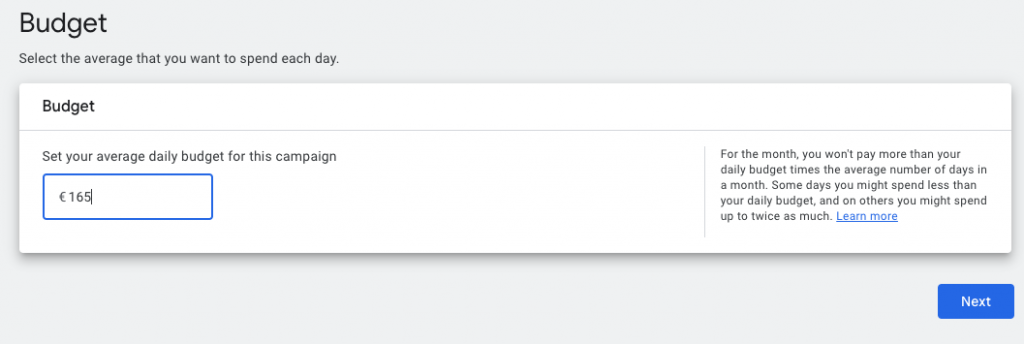
5. Budget
Now it’s time to set your campaign budget. When setting the daily budget, consider the following:
- If you add assets, you may want to increase the budget, as you’ll be targeting multiple channels.
- Second, when creating different campaigns for the different labels, you don’t want to allocate the same budget to each campaign.
Note: It is important to keep on monitoring your campaign budget after the launch of the campaigns.
6. Check and repeat
Do one final review of your campaign to make sure everything is set correctly and publish it!
Don’t forget to repeat the process for Sidekicks, Villains, and Zombies.
Conclusion
In this article, we’ve explained how to set up the Producthero Labelizer Strategy both in the Producthero Platform and Google Ads, helping you maximize your campaigns by optimizing costs. To see the direct impact of the Labelizer Strategy in action, have a look at some of our case studies, created in collaboration with advertisers from various countries:
- How Fuelyourbody increased its conversions by 225% using Producthero Labelizer for product segmentation.
- How Ivatherm’s Shopping campaigns performance in Romania significantly improved after starting using the Labelizer Streategy